
Jupyter Lab, Desktop Environments, and Text Editors
Description:
Earlier in the workshop you launched a VICE image with RStudio. Follow the same process again using our Jupyter Lab Geospatial container instead.
We have integrated Project Jupyter’s Data Science Jupyter Lab images with geospatial packages.
We have also integrated an all-in-one container which supports a desktop environment, Jupyter, VS Code (or your favorite text editors), and even RStudio. This container represents a ‘Workspace’ where you can do almost all of your daily data science tasks.
Starting the VICE app
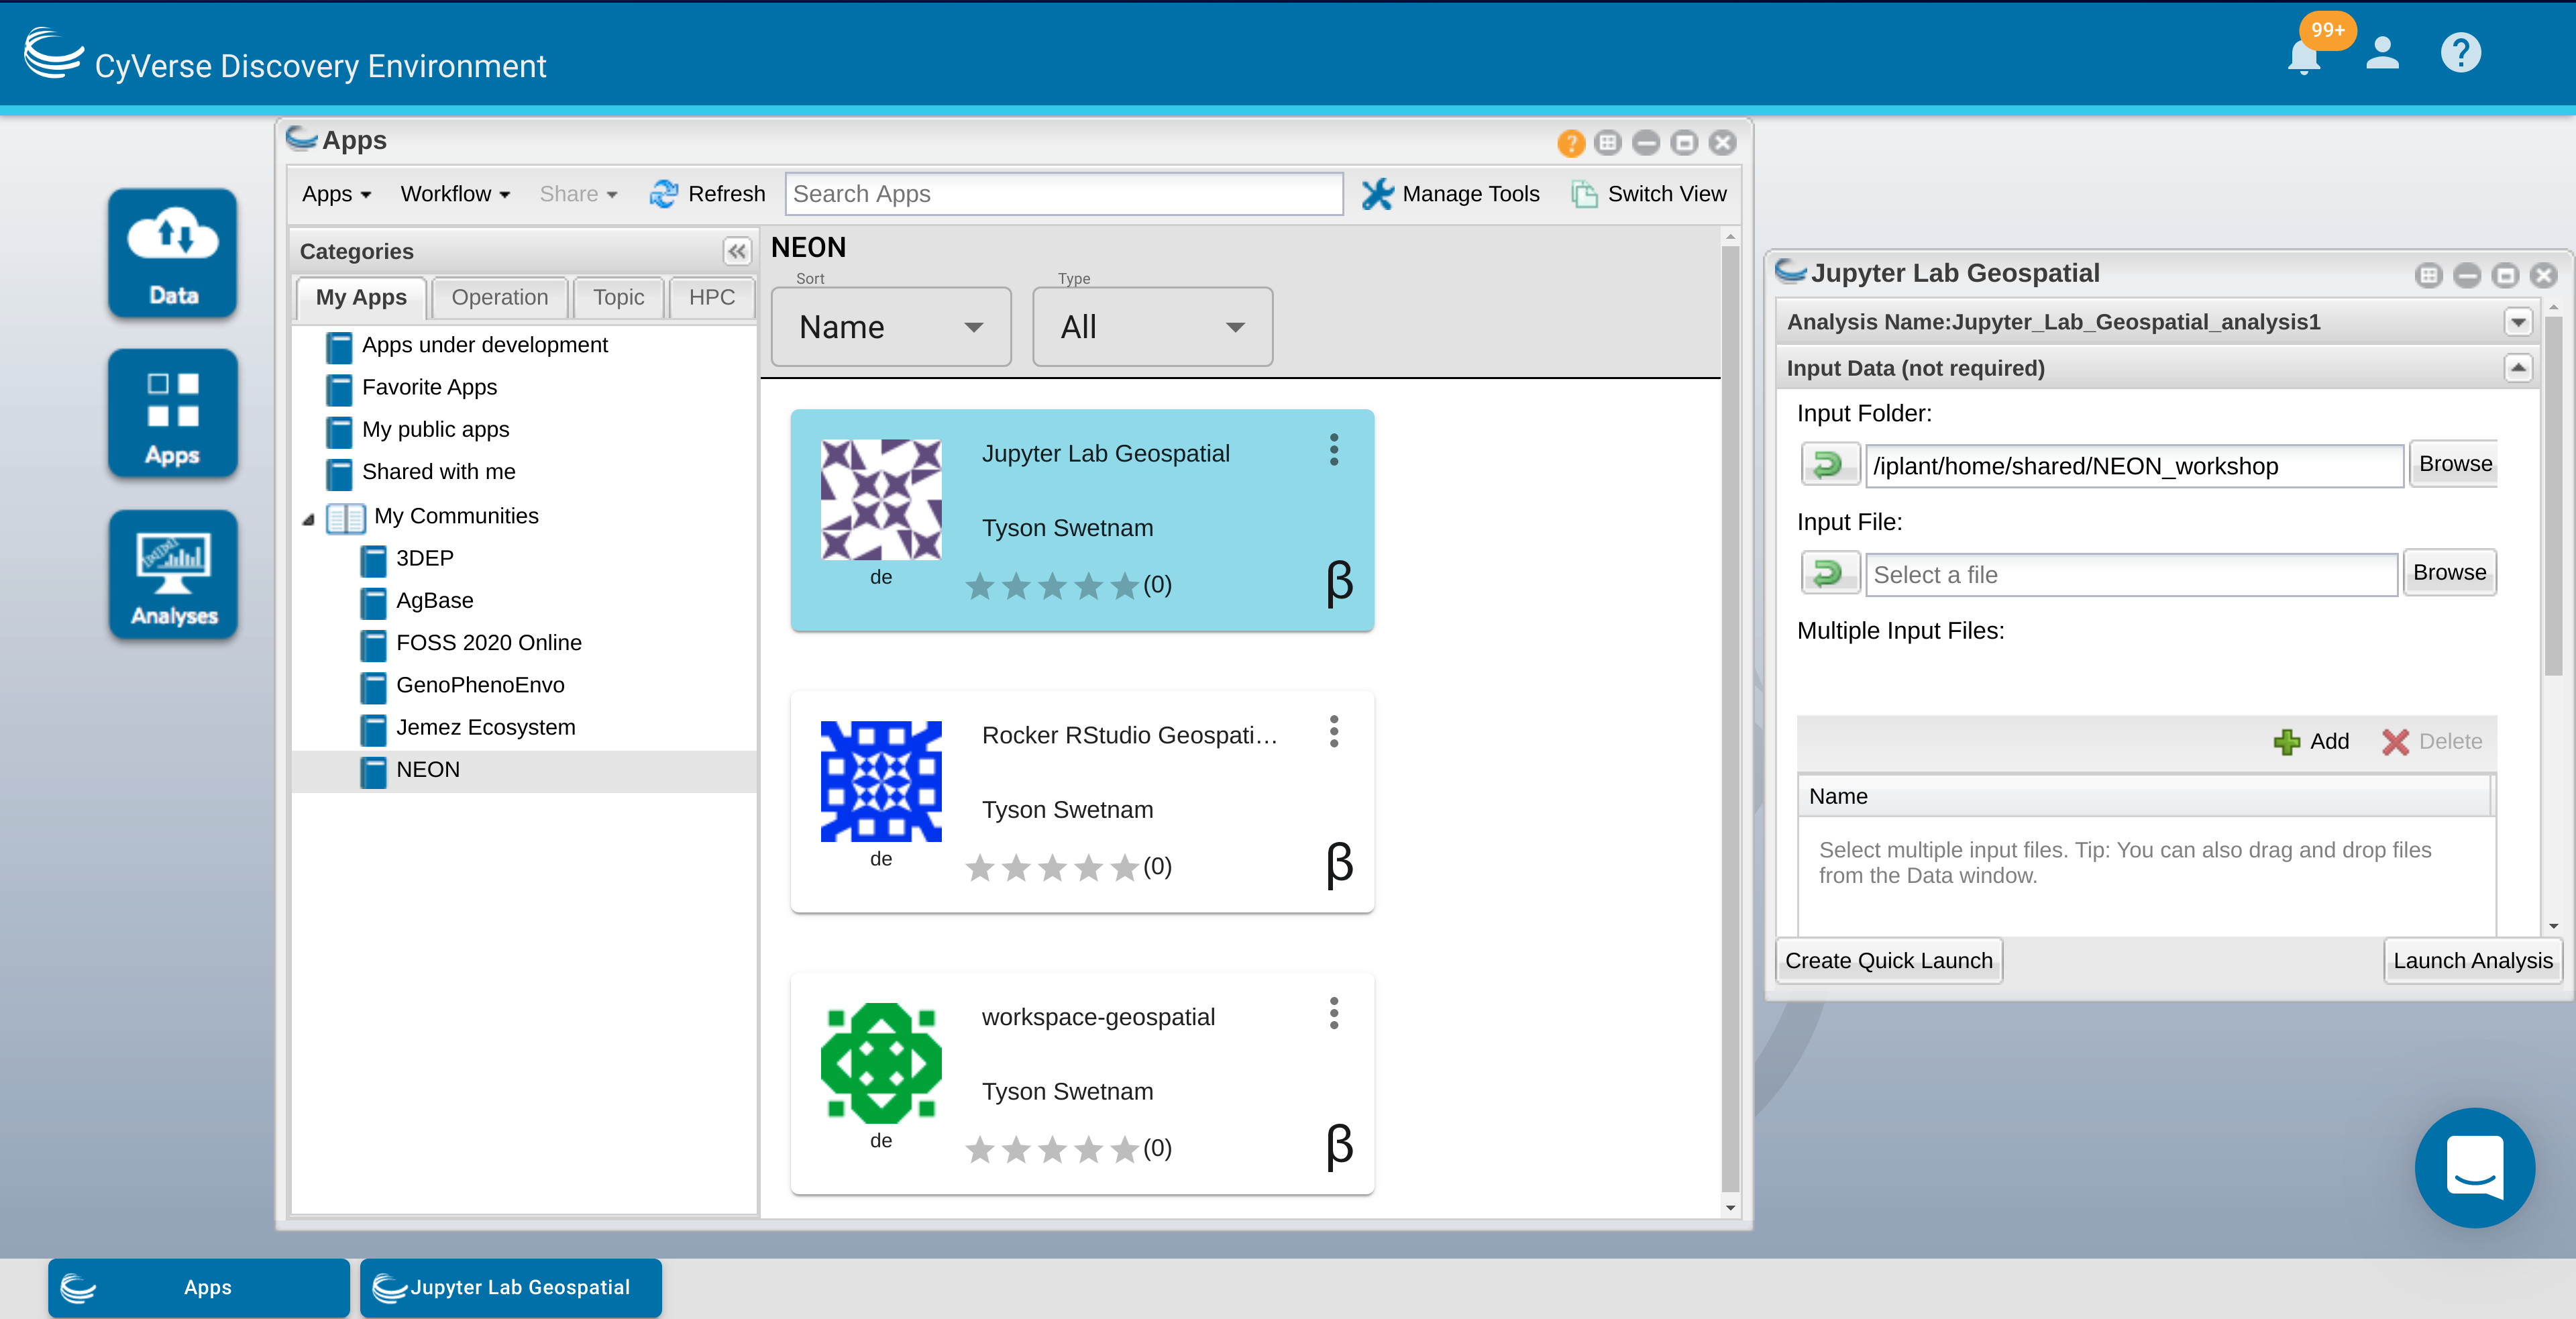
1. Log into the Discovery Environment: https://de.cyverse.org
2. Click one of our quick launch buttons:
- Jupyter Lab Geospatial:
- Workspace:
Or, search using the
‘Apps’ search bar.
query “jupyter lab geospatial” or “workspace geospatial” and see what comes up.
Or, click the App button and a new window should open.
Under “My Apps” section click on the “My Communities” section and “NEON” Group should appear

3. In the App Window you have a few options.
i.
Analysis Name- you can change the name of the analysis if you like, the default name is typically<the-app-name>_analysis1Your analysis will run, and when it completes, it will write any data that you have in the WORKING DIRECTORY of the container back to the Data Store in your Analyses folder, e.g./iplant/home/<username>/analyses/<the-app-name>_analysis1-<DATE-TIME-of-job-starting>ii. The second section is
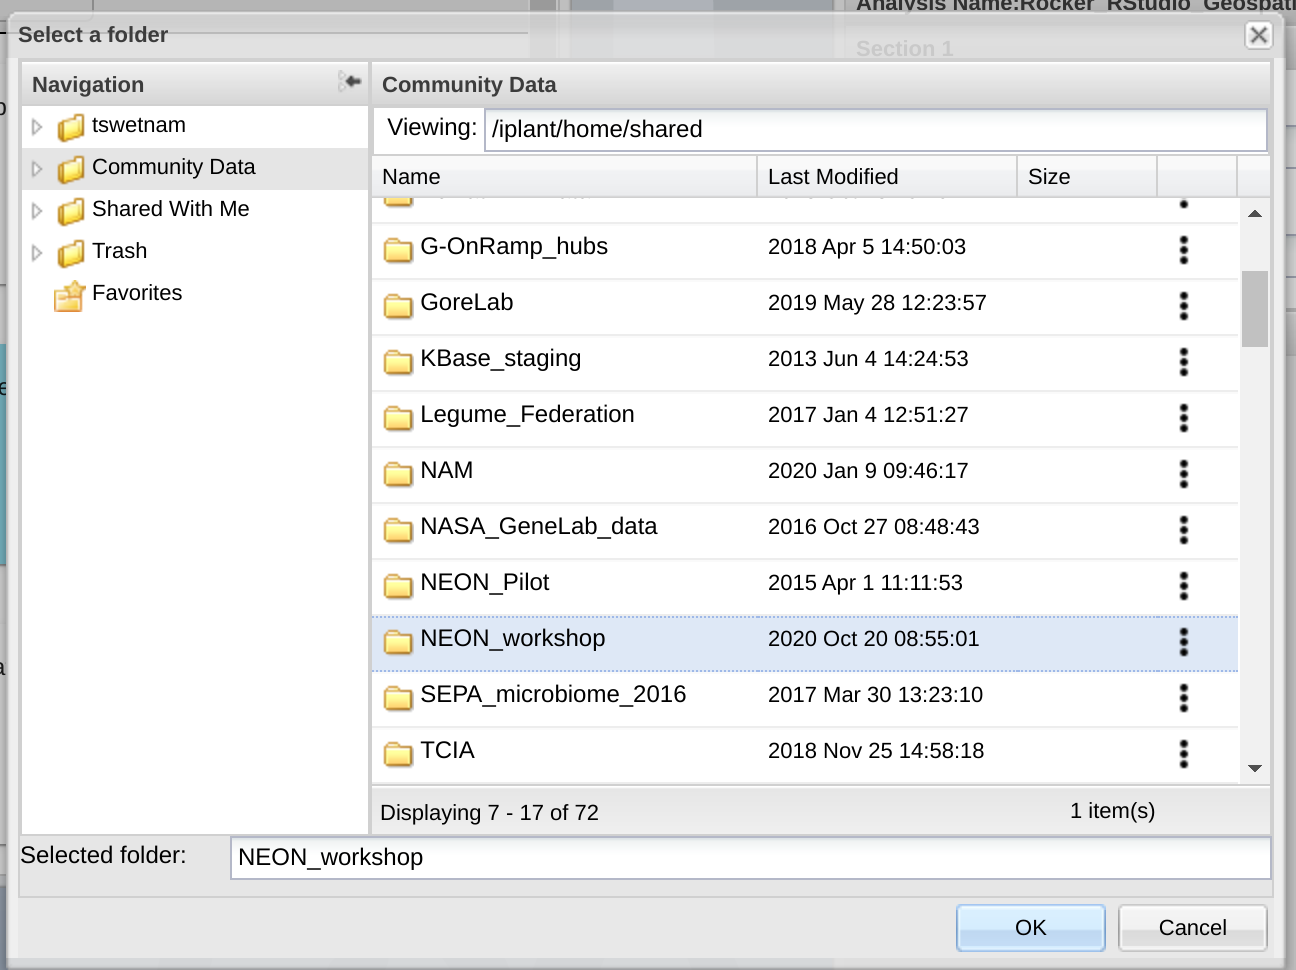
Input Dataand has options for adding (1) a folder, (2) a single file, or (3) multiple files.For our use case today, we’re going to add a folder from the data store.
Add the path:/iplant/home/shared/NEON_workshop/
iii. The third section is
Resource Requirements, again you can leave the default settings.You can set the
Minimum CPUto the minimum number of cores your app requires. If you do not select anything, the app will still be able to use multiple cores on the shared node on which it is deployed.You can set the
Minimum RAMto the minimum number of GB of RAM you think your app requires.You can set the
Minimum Disk Spaceto the minimum amount of scratch space you think your data will need.iv. After you’ve set the analysis name, input data, and resource requirements, click
Launch Analysis
Watch closely, you’ll see a notification at the top of your screen and in the Bell icon in the upper right.
4. Open the ![]() icon labeled “Analyses” to view your running analysis.
icon labeled “Analyses” to view your running analysis.
Look for your App Name. See the square icon with an arrow pointed up to the right? Click on that icon and a new tab will open.
Alternately, click the Bell icon in the upper right to see your notifications, you should see ‘Access your running analysis here.’ as an option. Click on that link and a new tab will open.

5. Having clicked on either of the hyperlinked icons in Step 4 should result in a new tab opening in your browser.
Your Discovery Environment Browser tab should still be open.
The new URL for the instance has changed from
https://de.cyverse.org/de/to something likehttps://af7664685.cyverse.run/.This is a new instance is running a Virtual Machine for you on CyVerse cloud.
You can now begin working in your running instance.
Description of output and results
You should now be ready to run the NEON Python API tutorial
Note, there are pre-completed .ipynb notebooks in the /tutorials folder which you added to the Instance when it was created. These should be in the working directory under the /NEON_workshop directory. You can use these for guidance, particularly if you fall behind.
Fix or improve this documentation
- Search for an answer: CyVerse Learning Center
- Ask us for help:
click
 on the lower right-hand side of the page
 - Report an issue or submit a change: Github Repo Link
- Send feedback: learning@CyVerse.org